CEILING PAINTING
CEILING PAINTING SERVICES
Sometimes referred to as the fifth wall of a room, the ceiling plays an important role in the look and feel of the space. Over time, a white ceiling will turn different shades of yellow because of various factors, including moisture, sunlight, candles, smoke, cooking oils, and other things that circulate through the space. The yellowing is usually fairly gradual, and often goes unnoticed for a long period of time, but once you see it, it’s hard to ignore it. Ceiling painting will not only eliminate the yellowing, but will also help brighten the space and make it feel larger and more open.
Once you’ve decided it’s time to have your ceilings painted, the task itself will feel pretty daunting. If not painted correctly, the ceiling can look spotty and sloppy. Painting a ceiling often requires ladders and involves a lot of back and neck aches. If you want to avoid all of the hassle, you just need to pick up the phone and call us at Grand Junction Painters. Our team of highly experienced painters have been transforming ceilings with ease for years. We’ll get the job done quickly and with minimal interruption to your daily routine.
As we’ve already mentioned, the team at Grand Junction Painters is highly skilled and experienced when it comes to painting ceilings. We have the tools and knowledge to paint a wide range of ceiling types and various textures, without interfering with light fixtures or creating a huge mess below. If you’re looking for a way to freshen up the ceilings in your home or business, call us today for a free estimate!
No ceiling is too tall and no texture is too rough for us!

Contact Us
CEILING PAINTING IN GRAND JUNCTION
If you’ve ever painted a few walls in your home or business, you may be feeling like you’re an experienced painter and that the ceiling will be a simple job. There are some important differences, however, when it comes to ceiling painting that you’ll want to pay attention to in order to avoid mistakes and frustration.
Paint
Ceiling paint should be thicker and stickier than wall paint so that it is less likely to drip everywhere. The most popular type of ceiling paint is a flat or matte finish because they hide imperfections better. Most people choose white for their ceiling color not only because it is more traditional, but also because it reflects more light and makes rooms look brighter and larger. When people want to add more style and pizazz to their room, adding a pop of color to the ceiling is a great way to do it.
Materials Needed
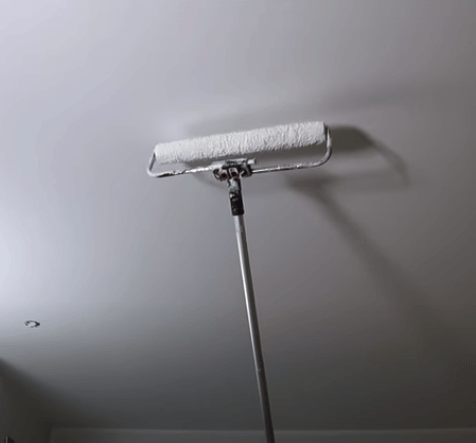
Every paint job requires a much longer list of materials than you’d think you would need. We recommend using a thick canvas drop cloth with rubber backing to protect the floor. If you are unable to remove all of the furniture from the space, you’ll need more drop cloths or plastic sheeting to cover it all. Other materials include: primer, paint tray, angled paint brush for edging, painter’s tape, paint roller, extension pole, paint stirrer, spackle, sandpaper (fine and medium grits), paint, rags, and a vacuum. If the ceiling has a smooth texture, a low nap roller is best, and if the ceiling is textured, you’ll need a roller with either a ½ inch or ¾ inch nap.
Preparation
As mentioned, it’s best to remove as much furniture and personal items as possible before painting the ceiling. The canvas drop cloth should be placed on the floor, ideally covering the entire space. If it doesn’t, you can either use two drop cloths or move the one around as you paint. Be sure all items left in the room are covered with the plastic sheeting.
If you do not plan to paint your walls, we recommend covering them with plastic as well. It is very easy to drip or splatter the ceiling paint onto them, so protect them as much as you can. Cover windows and doors with plastic and remove or tape off any light fixtures, fans, smoke detectors, etc that are on your ceiling.
Once the area is prepped, it’s time to make sure your ceiling is clean by removing any dust or cobwebs. If you notice any cracks or holes, fill them in with spackle. Use the sandpaper to smooth out any rough spots, and then be sure to vacuum and clean any dust afterwards. Use painter’s tape that is at least 2 inches thick to tape off the seams between the walls and ceiling.
Priming and Painting
The ceiling needs to be primed in order for the paint to adhere to it. We recommend using a stain-blocking primer to cover any stains from water, smoke, etc and a high-build primer if you’re painting a textured ceiling. The primer should be applied with the roller and allowed to thoroughly dry.
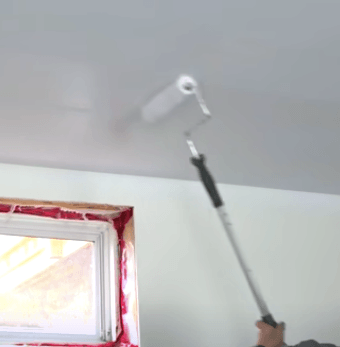
Use a paintbrush to cut in, which means painting the edges of the ceiling where it meets the walls. This will ensure you get paint around all the edges and corners of the ceiling without touching the walls. We recommend cutting in by sections and using the roller to cover the same section before moving to the next. This allows the paint to remain wet so it all blends together better.
When you begin rolling the rest of the ceiling, it’s always best to work in 4 inch square areas. This helps with even paint application and a higher quality of work. Always overlap your rows of paint and roll in different directions so that everything blends more smoothly.
Ceilings typically require two coats of paint. Be sure to let the first coat dry before applying the second. We recommend applying the second coat much more quickly and in one direction.
PROFESSIONAL CEILING PAINTERS
While you may be thinking about how easy and affordable ceiling painting seems, it's always best to hire a professional painter. Avoid the prep work, painting, and clean up and enjoy your day while we do all the work! Call today for a free estimate!