TRIM & MOLDING PAINTING
TRIM PAINTING SERVICES
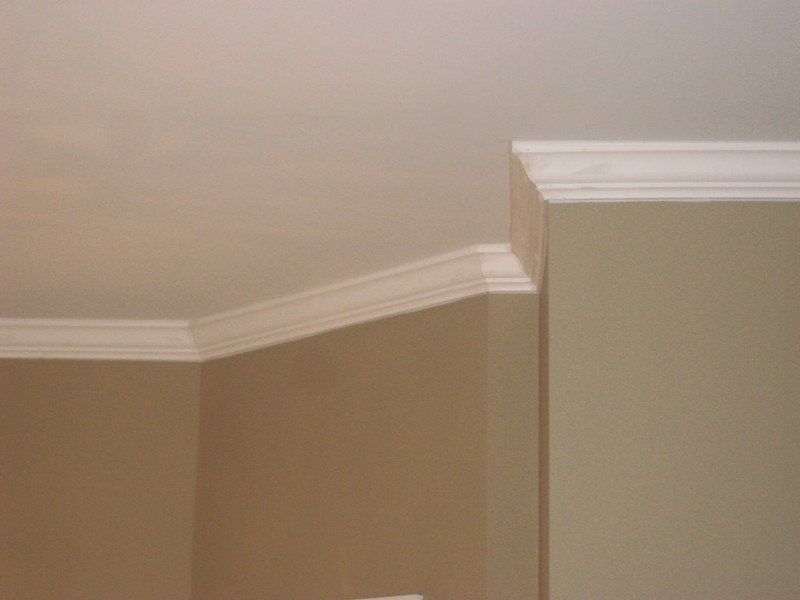
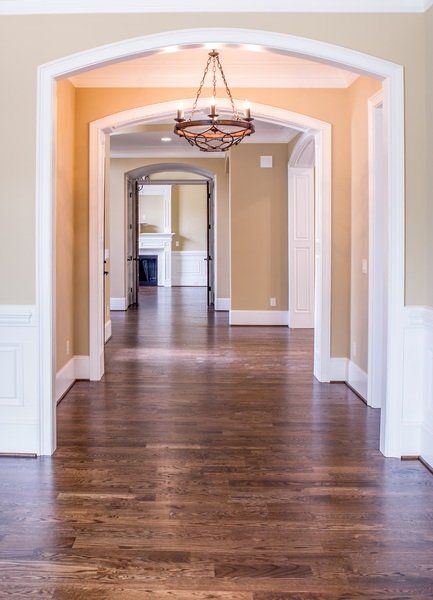
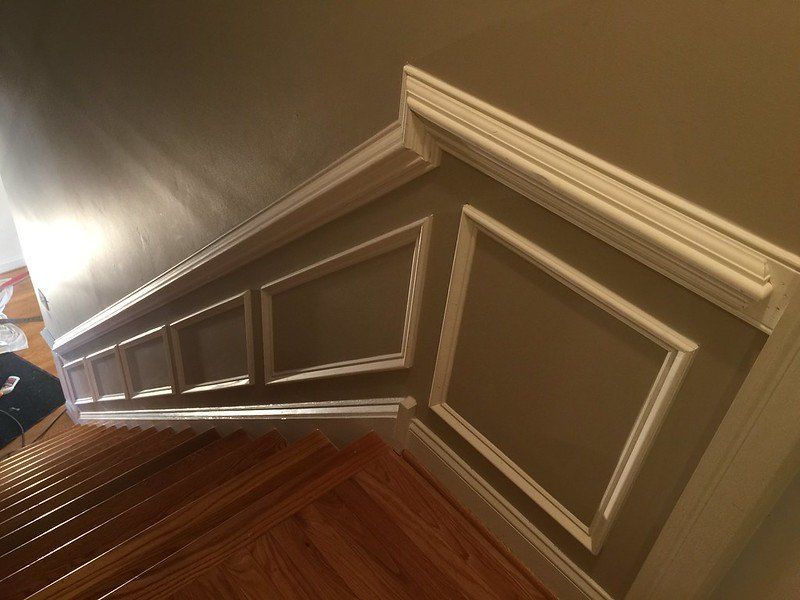
One of the most important, but often overlooked, parts of interior painting is painting your trim and molding. When done correctly, it can really add a touch of elegance to your home. Grand Junction Painters can help you achieve this look with our high-quality trim and molding painting services. Whether your current trim is all banged up from daily life, or you'd like to change the entire look of your home by painting the trim and molding a different color, we'll get the job done!
Trim and molding not only add to the value of a home, but they also improve the aesthetics and can give rooms a more elegant look. Choosing the right color to complement your walls and decor can be a daunting task, but not when you work with the color experts at Grand Junction Painters. Call us today to discuss your next painting project!

Contact Us
PAINTING TRIM VS. STAINING TRIM
There are pros and cons to both painting and staining trim. Painting trim is a great way to brighten up a room, and it's also a less expensive option than staining. However, painting trim can also be less durable than staining, and it may not hold up as well over time.
Staining trim, on the other hand, is more expensive but can give your home a more polished look. It's also more durable than painting, and can last for many years with proper care. If you're on the fence about whether to paint or stain your trim, we encourage you to call Grand Junction Painters for a free consultation! We'll help you choose the best option for your home.
SHOULD TRIM BE PAINTED BEFORE OR AFTER WALLS?
Painting the trim before or after the walls is a personal decision, and there are pros and cons either way you do it.
Most inexperienced painters will do better painting the walls first because it is easier and more efficient. This way allows you to be a little messy when painting the walls without making the whole paint job look sloppy. The best way to do it is to use your roller all the way to the trim, and then use a paintbrush to get into the corners when painting the trim. Knowing that you're going to paint the trim and cover any accidental splatters from the wall paint allows you to be a little less precise with the bulk of the job.
Painting the walls first is also very motivating. Painting the walls first makes a noticeable difference, and will help boost your energy and motivation to finish the job.
Others who like to paint the trim first find that using painters tape to cover the edges of trim, molding, and baseboards is easier than covering the entire perimeter of the walls. Some feel that cutting into the narrow (and often curved) trim is more difficult than cutting in over wide, flat walls. Because trim and molding are typically painted with a high-gloss or oil-based paint, even small marks of this paint can show through the matte wall paint, so a steady hand and extra time are necessary for this method.
STEPS FOR PAINTING TRIM
If you decide to go the DIY route, you'll need patience and time to paint your trim and molding correctly. Before you put the paint on, there are several steps you must follow in order to achieve a professional look:
If you feel that you don't have the time or the steady hand to paint your trim, we won't judge you! Give us a call and we can get the job done for you!
PAINTING SERVICES IN GRAND JUNCTION
WALLS ● CEILINGS ● STAIRWAYS ● KITCHENS ● BATHROOMS ● CABINET REFINISHING ● CUSTOM MURALS
FENCES ● SHEDS ● PERGOLAS ● BRICKS ● SIDING ● DOORS ● SHUTTERS